

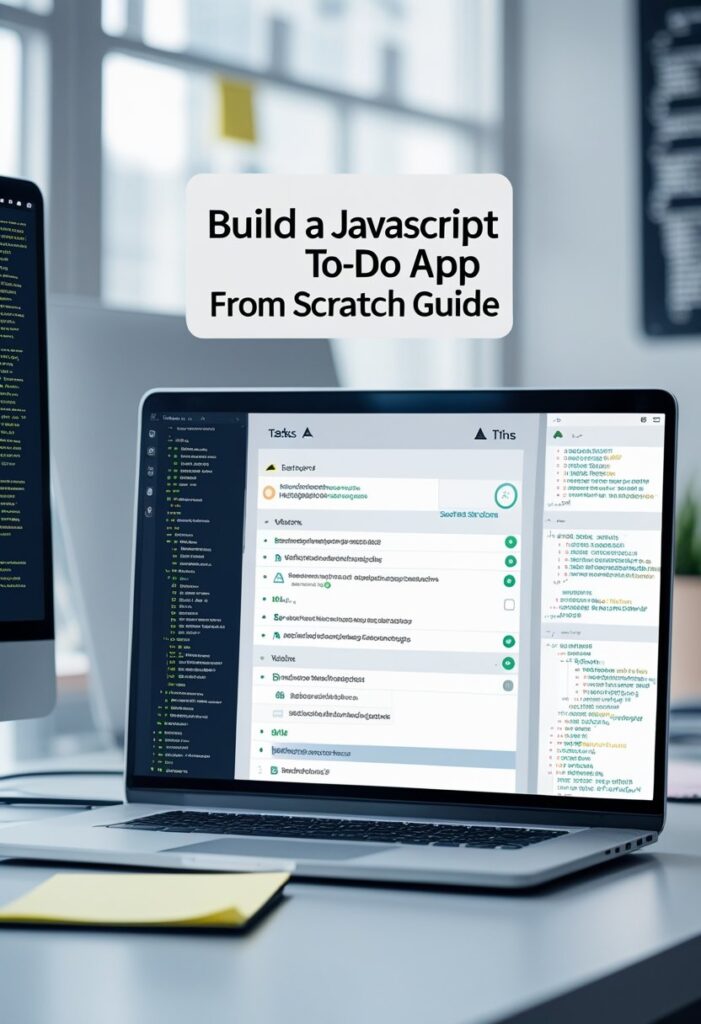
Build a JavaScript To-Do App From Scratch: The Ultimate Beginner’s Guide .So, you’ve learned the basics of HTML, CSS, and JavaScript. You understand variables, functions, loops, and maybe even some DOM manipulation. But now comes the big question: “What do I build?”
Enter the To-Do App. It might sound like the most basic project idea out there. But don’t underestimate it. A To-Do app is the perfect sandbox. It teaches you the core concepts of web development in a practical way:
- CRUD Operations: You’ll learn to Create, Read, Update, and Delete data.
- DOM Manipulation: You’ll dynamically add, remove, and change elements on the page.
- Event Handling: You’ll respond to clicks, form submissions, and other user actions.
- Data Storage: You’ll learn to save data in the browser so it doesn’t disappear when you refresh the page.
What We’re Building (Our Game Plan)
Before we write a single line of code, let’s outline what our app will do. This helps us stay focused.
Core Features:
- An input field to type a new task.
- An “Add” button to add that task to the list.
- Display all tasks in a list.
- A checkbox next to each task to mark it as complete.
- A “Delete” button next to each task to remove it.
- Data persistence: If you refresh the page, your tasks should still be there.
Bonus Features (We’ll add these later if we have time):
- A count of how many tasks are left.
- A button to clear all completed tasks.
Step 1: Setting Up the Project Files
First, we need a place to work. Create a new folder on your computer called todo-app. Inside that folder, create three files:
index.html(This will be the structure of our page)style.css(This will make it look pretty)script.js(This will be the brain of the operation)
Open this folder in your favorite code editor (like VS Code). Let’s start with the HTML.
Step 2: Building the HTML Structure
We’ll keep the HTML simple and semantic. We need a container, a heading, an area to add new tasks, and a place to list the tasks.
Open index.html and paste the following code:
<!DOCTYPE html>
<html lang="en">
<head>
    <meta charset="UTF-8">
    <meta name="viewport" content="width=device-width, initial-scale=1.0">
    <title>My Super To-Do App</title>
    <link rel="stylesheet" href="style.css">
</head>
<body>
    <div class="container">
        <h1>✅ My To-Do List</h1>

        <div class="input-section">
            <input type="text" id="todo-input" placeholder="What needs to be done?">
            <button id="add-btn">Add Task</button>
        </div>

        <div class="task-stats">
            <span id="task-count">0 tasks left</span>
        </div>

        <ul id="todo-list">
            <!-- Tasks will be dynamically added here by JavaScript -->
        </ul>

        <div class="action-buttons">
            <button id="clear-completed-btn">Clear Completed</button>
        </div>
    </div>

    <script src="script.js"></script>
</body>
</html>
Let’s break this down quickly:
<div class="container">: This centers everything and gives us a box to style.<input type="text" id="todo-input">: This is where the user types their new task. We gave it anidso JavaScript can easily grab its value.<button id="add-btn">: The button to submit the task. It also has a uniqueid.<ul id="todo-list">: This is an empty unordered list. This is where all our tasks will go. JavaScript will create new<li>items and put them inside here.<span id="task-count">: We’ll update this number later to show how many tasks are not done.<button id="clear-completed-btn">: A button to clean up the list.
If you open this HTML file in a browser right now, it will look pretty plain. Let’s fix that with some CSS.
Step 3: Styling with CSS (Making it Look Good)
We want our app to be clean and easy to use. Open style.css and add the following styles:
/* style.css */
* {
    margin: 0;
    padding: 0;
    box-sizing: border-box;
    font-family: system-ui, -apple-system, 'Segoe UI', Roboto, sans-serif;
}

body {
    background: linear-gradient(135deg, #667eea 0%, #764ba2 100%);
    min-height: 100vh;
    display: flex;
    justify-content: center;
    align-items: center;
    padding: 20px;
}

.container {
    background-color: white;
    padding: 30px 40px;
    border-radius: 15px;
    box-shadow: 0 20px 40px rgba(0, 0, 0, 0.2);
    width: 100%;
    max-width: 550px;
}

h1 {
    text-align: center;
    margin-bottom: 25px;
    color: #333;
    font-weight: 600;
    font-size: 2rem;
    border-bottom: 2px solid #f0f0f0;
    padding-bottom: 15px;
}

.input-section {
    display: flex;
    gap: 10px;
    margin-bottom: 25px;
}

#todo-input {
    flex: 1;
    padding: 12px 18px;
    border: 2px solid #e0e0e0;
    border-radius: 8px;
    font-size: 1rem;
    transition: border 0.2s;
    outline: none;
}

#todo-input:focus {
    border-color: #667eea;
}

#add-btn {
    padding: 12px 25px;
    background-color: #667eea;
    color: white;
    border: none;
    border-radius: 8px;
    font-size: 1rem;
    font-weight: 600;
    cursor: pointer;
    transition: background-color 0.2s, transform 0.1s;
}

#add-btn:hover {
    background-color: #5a67d8;
}

#add-btn:active {
    transform: scale(0.97);
}

.task-stats {
    margin-bottom: 15px;
    font-size: 0.95rem;
    color: #666;
    font-weight: 500;
}

#todo-list {
    list-style: none;
    margin-bottom: 25px;
    max-height: 350px;
    overflow-y: auto;
    padding-right: 5px;
}

/* Style for each task item */
.task-item {
    display: flex;
    align-items: center;
    padding: 12px 10px;
    background-color: #f9f9ff;
    border: 1px solid #eaeaea;
    border-radius: 8px;
    margin-bottom: 8px;
    transition: box-shadow 0.2s, background-color 0.2s;
}

.task-item:hover {
    box-shadow: 0 2px 8px rgba(102, 126, 234, 0.2);
    background-color: #ffffff;
}

/* Checkbox style */
.task-item input[type="checkbox"] {
    width: 20px;
    height: 20px;
    margin-right: 15px;
    cursor: pointer;
    accent-color: #667eea;
}

/* The task text */
.task-text {
    flex: 1;
    font-size: 1.05rem;
    color: #333;
    word-break: break-word;
}

/* Style for when a task is completed */
.task-item.completed .task-text {
    text-decoration: line-through;
    color: #a0a0a0;
}

/* Delete button */
.delete-btn {
    background-color: transparent;
    color: #e53e3e;
    border: 1px solid #e53e3e;
    border-radius: 6px;
    padding: 6px 14px;
    font-size: 0.85rem;
    font-weight: 600;
    cursor: pointer;
    transition: all 0.2s;
    margin-left: 10px;
}

.delete-btn:hover {
    background-color: #e53e3e;
    color: white;
}

.action-buttons {
    display: flex;
    justify-content: flex-end;
    border-top: 1px solid #f0f0f0;
    padding-top: 20px;
}

#clear-completed-btn {
    background-color: transparent;
    color: #718096;
    border: 1px solid #cbd5e0;
    border-radius: 6px;
    padding: 8px 18px;
    font-size: 0.9rem;
    font-weight: 500;
    cursor: pointer;
    transition: all 0.2s;
}

#clear-completed-btn:hover {
    background-color: #f7fafc;
    color: #2d3748;
    border-color: #a0aec0;
}Step 4: JavaScript – The Brain of the App
Now for the fun part. Open your script.js file. We’re going to build this step by step.
4.1: Getting Our HTML Elements
// script.js

// Get the elements we need from the DOM
const todoInput = document.getElementById('todo-input');
const addButton = document.getElementById('add-btn');
const todoList = document.getElementById('todo-list');
const taskCountSpan = document.getElementById('task-count');
const clearCompletedBtn = document.getElementById('clear-completed-btn');

// Let's test if we got them correctly
console.log('JS is connected!', todoInput, addButton);4.2: Planning Our Data Structure
How do we keep track of our tasks? We’ll use an array. Each task will be an object with a few properties:
id: A unique identifier for the task. We’ll useDate.now()for this, which gives us a unique number based on the current time.text: The actual description of the task (e.g., “Buy groceries”).completed: A boolean (trueorfalse) to mark if the task is done.
Let’s create an empty array to hold our tasks. We’ll also create a few dummy tasks to test with.
// Our array of tasks. Starts empty, but we'll add dummy data for testing.
let tasks = [];

// Dummy data to test with
tasks = [
    {
        id: Date.now() + 1,
        text: 'Learn JavaScript',
        completed: true,
    },
    {
        id: Date.now() + 2,
        text: 'Build a To-Do App',
        completed: false,
    },
    {
        id: Date.now() + 3,
        text: 'Take a break',
        completed: false,
    },
];
4.3: The Render Function – Displaying Tasks on the Screen
This is the most important function in the whole app. We’ll call it render(). Its job is to:
- Clear the current list (
todoList.innerHTML = ''). - Loop through the
tasksarray. - For each task, create an
<li>element with the appropriate classes, a checkbox, the task text, and a delete button. - Append this new
<li>to thetodoList. - Update the task counter.
function render() {
    // 1. Clear the list
    todoList.innerHTML = '';

    // 2. Loop through the tasks array
    tasks.forEach((task) => {
        // 3. Create the list item (li)
        const li = document.createElement('li');
        li.className = 'task-item';
        // Add a special class if the task is completed
        if (task.completed) {
            li.classList.add('completed');
        }

        // Create the checkbox
        const checkbox = document.createElement('input');
        checkbox.type = 'checkbox';
        checkbox.checked = task.completed;
        // We'll add an event listener later to handle checking/unchecking
        // For now, let's just create it.

        // Create the span for the task text
        const textSpan = document.createElement('span');
        textSpan.className = 'task-text';
        textSpan.textContent = task.text;

        // Create the delete button
        const deleteBtn = document.createElement('button');
        deleteBtn.className = 'delete-btn';
        deleteBtn.textContent = 'Delete';
        // We'll add the delete functionality later

        // Assemble everything: li gets the checkbox, text, and button
        li.appendChild(checkbox);
        li.appendChild(textSpan);
        li.appendChild(deleteBtn);

        // Append the li to the main list
        todoList.appendChild(li);
    });

    // 4. Update the task count
    updateTaskCount();
}

function updateTaskCount() {
    // Count how many tasks are NOT completed
    const incompleteTasks = tasks.filter(task => !task.completed).length;
    taskCountSpan.textContent = `${incompleteTasks} tasks left`;
}

// Call render to display our dummy data
render();4.4: Adding a New Task
Now we need to hook up the “Add Task” button. When clicked, it should:
- Get the text from the input field.
- Make sure it’s not empty.
- Create a new task object.
- Add it to our
tasksarray. - Clear the input field.
- Re-render the list so the new task appears.
function addTask() {
    const taskText = todoInput.value.trim(); // Get text and remove extra spaces

    // Basic validation: Don't add empty tasks
    if (taskText === '') {
        alert('Please enter a task!');
        return; // Stop the function here
    }

    // Create the new task object
    const newTask = {
        id: Date.now(), // This gives a unique number based on the current timestamp
        text: taskText,
        completed: false,
    };

    // Add it to our tasks array
    tasks.push(newTask);

    // Clear the input field
    todoInput.value = '';
    todoInput.focus(); // Put the cursor back in the input for quick adding

    // Re-render the list
    render();
}

// Add event listener to the button
addButton.addEventListener('click', addTask);

// Optional: Allow pressing "Enter" to add a task
todoInput.addEventListener('keypress', (event) => {
    if (event.key === 'Enter') {
        addTask();
    }
});
Go ahead and test it! Type a task like “Walk the dog” and click the button. It should appear in the list instantly.
4.5: Deleting a Task
Modify the delete button creation part inside your render() function. Look for the part where we create the delete button.
// Inside the render() function, where you create the delete button:
const deleteBtn = document.createElement('button');
deleteBtn.className = 'delete-btn';
deleteBtn.textContent = 'Delete';

// --- ADD THIS EVENT LISTENER ---
deleteBtn.addEventListener('click', (event) => {
    // Stop the click from affecting the parent elements (event bubbling)
    event.stopPropagation();
    // Call a function to delete the task, passing the task's id
    deleteTask(task.id);
});
// ------------------------------
Now, we need to create the deleteTask function outside of render().
function deleteTask(taskId) {
    // Filter out the task that has the matching id
    // This creates a NEW array without that task
    tasks = tasks.filter(task => task.id !== taskId);

    // Re-render the list
    render();
}
filter is a powerful array method. It loops through the array and returns a new array containing only the elements for which the condition returns true. So, task.id !== taskId will keep all tasks except the one we want to delete.
Test it out! Click the delete button next to a task. Poof! It’s gone.
4.6: Toggling Task Completion (Checkboxes)
We need to handle when a user checks or unchecks a box. This is similar to the delete button; we need to attach the event listener when the checkbox is created.
Modify the checkbox creation part inside your render() function:
// Inside the render() function, where you create the checkbox:
const checkbox = document.createElement('input');
checkbox.type = 'checkbox';
checkbox.checked = task.completed;

// --- ADD THIS EVENT LISTENER ---
checkbox.addEventListener('change', (event) => {
    // When the checkbox changes, we want to update the 'completed' status of the task
    toggleTaskCompletion(task.id, event.target.checked);
});
// ------------------------------
Now, create the toggleTaskCompletion function:
function toggleTaskCompletion(taskId, isCompleted) {
    // Find the task in the array and update its 'completed' property
    const task = tasks.find(task => task.id === taskId);
    if (task) {
        task.completed = isCompleted;
    }

    // Re-render the list. This will also apply the 'completed' class to the <li>
    render();
}4.7: Clearing Completed Tasks
This is a nice cleanup feature. It’s simple to implement.
function clearCompleted() {
    // Filter out any task where 'completed' is true, keep only the incomplete ones
    tasks = tasks.filter(task => !task.completed);

    // Re-render
    render();
}

// Add the event listener to the button
clearCompletedBtn.addEventListener('click', clearCompleted);
Click the “Clear Completed” button, and all your finished tasks will vanish.
Step 5: Saving Data with Local Storage (The Magic Touch)
Right now, if you refresh the page, you lose all your tasks. That’s not a great user experience. We need to save the tasks array somewhere. The browser provides something called localStorage for this. It’s like a tiny database that lives in your browser.
How it works:
- We can only save strings in
localStorage. - We have a
tasksarray of objects. We’ll useJSON.stringify()to convert it into a string before saving. - When we load the page, we’ll get the string back and use
JSON.parse()to turn it back into an array.
Step 5.1: Saving to Local Storage
Let’s create a function called saveTasksToLocalStorage(). We’ll call this function every time the tasks array changes.
function saveTasksToLocalStorage() {
    localStorage.setItem('tasks', JSON.stringify(tasks));
}
Now, we need to call this function inside addTask(), deleteTask(), toggleTaskCompletion(), and clearCompleted(). Just add the line saveTasksToLocalStorage(); right before the render() call in each of those functions.
For example, in deleteTask:
function deleteTask(taskId) {
    tasks = tasks.filter(task => task.id !== taskId);
    saveTasksToLocalStorage(); // <-- Save before rendering
    render();
}
Do the same for the others.
Step 5.2: Loading from Local Storage on Start
When the page first loads, we need to check if there are any saved tasks in localStorage. If there are, we load them. If not, we start with an empty array.
At the very top of your script.js, where we first declared let tasks = [];, replace it with this logic:
// Load tasks from local storage when the app starts
function loadTasksFromLocalStorage() {
    const storedTasks = localStorage.getItem('tasks');
    if (storedTasks) {
        // If there are tasks saved, parse them back into an array
        tasks = JSON.parse(storedTasks);
    } else {
        // If nothing is saved, start with an empty array
        tasks = [];
    }
}

// Call the load function
loadTasksFromLocalStorage();

// Then call render to display whatever we loaded
render();
Now, remove the dummy data we added at the beginning. We don’t need it anymore. Your app is now fully functional! Add a few tasks, check some off, delete a few, and then refresh the page. Everything should be exactly as you left it.
Full JavaScript Code (For Reference)
Here’s how your final script.js should look:
// script.js

// --- Get DOM Elements ---
const todoInput = document.getElementById('todo-input');
const addButton = document.getElementById('add-btn');
const todoList = document.getElementById('todo-list');
const taskCountSpan = document.getElementById('task-count');
const clearCompletedBtn = document.getElementById('clear-completed-btn');

// --- Data ---
let tasks = [];

// --- Local Storage Functions ---
function saveTasksToLocalStorage() {
    localStorage.setItem('tasks', JSON.stringify(tasks));
}

function loadTasksFromLocalStorage() {
    const storedTasks = localStorage.getItem('tasks');
    if (storedTasks) {
        tasks = JSON.parse(storedTasks);
    } else {
        tasks = [];
    }
}

// --- Core Functions ---
function render() {
    todoList.innerHTML = '';

    tasks.forEach((task) => {
        // Create elements
        const li = document.createElement('li');
        li.className = 'task-item';
        if (task.completed) {
            li.classList.add('completed');
        }

        const checkbox = document.createElement('input');
        checkbox.type = 'checkbox';
        checkbox.checked = task.completed;
        checkbox.addEventListener('change', (event) => {
            toggleTaskCompletion(task.id, event.target.checked);
        });

        const textSpan = document.createElement('span');
        textSpan.className = 'task-text';
        textSpan.textContent = task.text;

        const deleteBtn = document.createElement('button');
        deleteBtn.className = 'delete-btn';
        deleteBtn.textContent = 'Delete';
        deleteBtn.addEventListener('click', () => {
            deleteTask(task.id);
        });

        // Assemble
        li.appendChild(checkbox);
        li.appendChild(textSpan);
        li.appendChild(deleteBtn);
        todoList.appendChild(li);
    });

    updateTaskCount();
}

function updateTaskCount() {
    const incompleteTasks = tasks.filter(task => !task.completed).length;
    taskCountSpan.textContent = `${incompleteTasks} tasks left`;
}

function addTask() {
    const taskText = todoInput.value.trim();
    if (taskText === '') {
        alert('Please enter a task!');
        return;
    }

    const newTask = {
        id: Date.now(),
        text: taskText,
        completed: false,
    };

    tasks.push(newTask);
    saveTasksToLocalStorage();
    todoInput.value = '';
    todoInput.focus();
    render();
}

function deleteTask(taskId) {
    tasks = tasks.filter(task => task.id !== taskId);
    saveTasksToLocalStorage();
    render();
}

function toggleTaskCompletion(taskId, isCompleted) {
    const task = tasks.find(task => task.id === taskId);
    if (task) {
        task.completed = isCompleted;
    }
    saveTasksToLocalStorage();
    render();
}

function clearCompleted() {
    tasks = tasks.filter(task => !task.completed);
    saveTasksToLocalStorage();
    render();
}

// --- Event Listeners ---
addButton.addEventListener('click', addTask);
todoInput.addEventListener('keypress', (event) => {
    if (event.key === 'Enter') {
        addTask();
    }
});
clearCompletedBtn.addEventListener('click', clearCompleted);

// --- Initialization ---
loadTasksFromLocalStorage();
render();
Conclusion: You Did It!
Congratulations! You haven’t just built a To-Do app. You’ve built a foundation.
Think about what you accomplished:
- You wrote HTML from scratch to create a solid structure.
- You applied CSS to make it look professional and clean.
- You used JavaScript to handle user interaction, manage data in an array, and dynamically update the page.
- You learned how to manipulate the DOM by creating and appending elements.
- You used
localStorageto make your app persistent.
This is the real deal. This is how real web applications work. The concepts you used here—CRUD operations, state management, rendering, and event handling—are the same concepts used in massive apps like Trello, Asana, or even Google Keep.
From here, the sky’s the limit. You can add features like due dates, priorities, or categories. But for now, take a moment to appreciate what you’ve built. You’re not just following tutorials anymore. You’re a developer. Now go add some tasks!
Frequently Asked Questions (FAQs)
1. I refreshed the page and my tasks are gone. What did I do wrong?
This usually means the localStorage part isn’t working correctly. First, check the browser’s console (F12) for any red error messages. Make sure you called saveTasksToLocalStorage() inside every function that changes the tasks array (add, delete, toggle, clear). Also, check the “Application” tab in your browser’s developer tools. Under “Local Storage,” you should see your site and an item called “tasks” with your data.
2. How can I edit a task after I’ve added it?
That’s a great next feature! You would need to add an “Edit” button. When clicked, it could replace the task text with a small input field and a “Save” button. This involves more complex DOM manipulation, but it’s a fantastic challenge to try on your own.
3. Why do we use task.id instead of just deleting based on the text?
What if you have two tasks with the exact same text, like “Buy milk”? If you tried to delete by text, you might delete the wrong one. An id is unique for every single task, so you always know exactly which one you’re targeting. Using Date.now() is a simple way to generate a “pretty unique” ID.
4. My delete button isn’t working. It does nothing when I click it.
This is a very common issue. Make sure you added the event listener inside the render() function, right after you created the button. The most common mistake is trying to select all delete buttons at the top of the script with document.querySelector(). Because those buttons don’t exist when the page first loads, that won’t work. You have to attach the listener at the moment the button is created.
5. Can I use this code on my portfolio?
Absolutely! This is a perfect project to showcase your skills. Just make sure you understand every line of code so you can explain it in an interview. If you add your own personal style or extra features, it becomes a unique piece of work that’s all yours.
